
Straw Bales for vegetables

I am trying something new for me. Its been around for a while now but I just now decided to give it a try and that is growing veggies in straw bales.
I have a friend who had done this and she had great success and I hope to too.
So I started by laying down some landscape fabric to help prevent weeds from growing underneath the bales. 
Being where my garden is located it is a never ending battle fighting weeds.


Then I postion the bales on their sides 


and started conditioning them with blood meal (doing it the organic way)


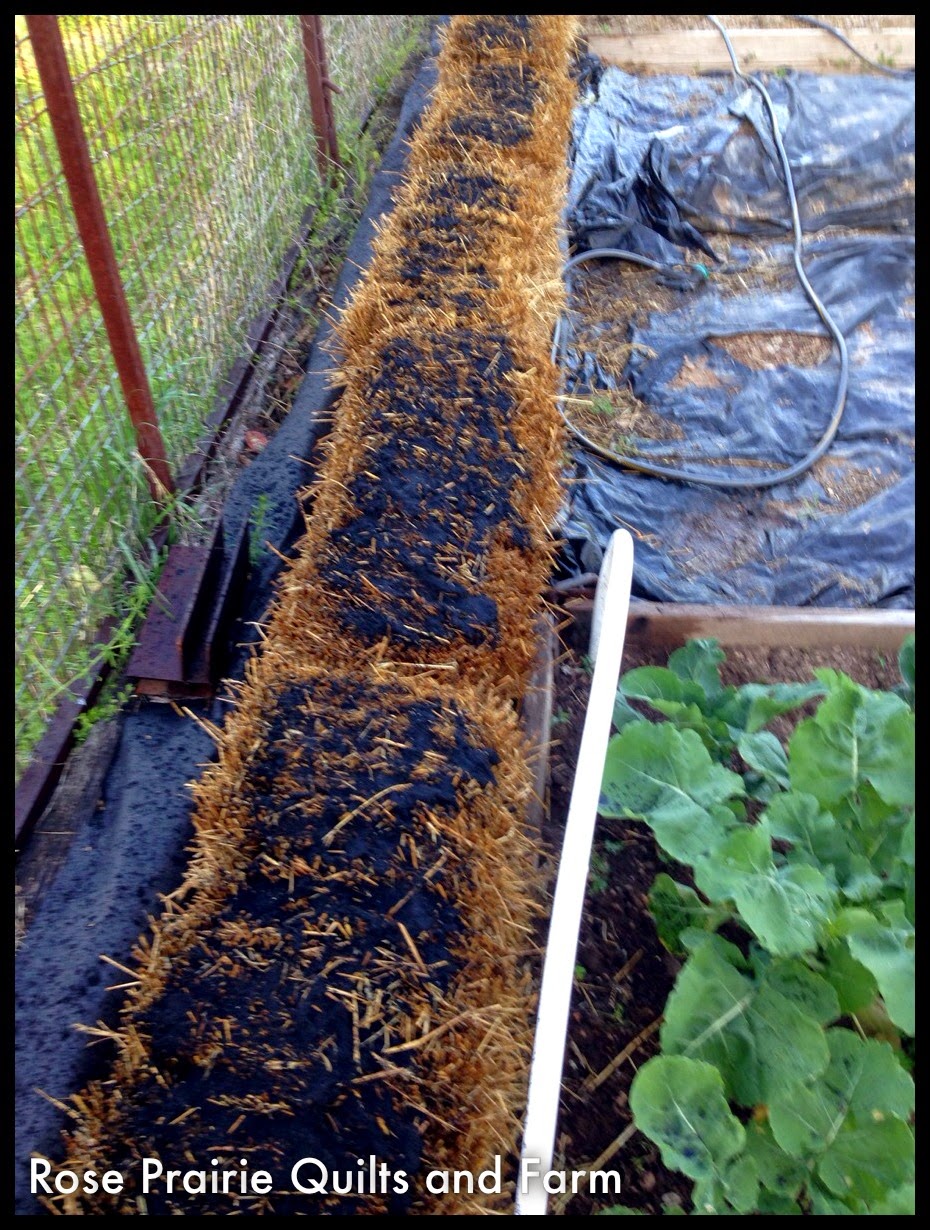
I apply 3 cups of blood meal per bale on day 1, 3, 5 
watering everyday. 
Day 7-9 I'll put 1.5 cups and continue to water it in each day.
Day 10 I'll apply a organic fertilizer.
Should be ready to plant 2 - 4 days later.
I'll keep posting pictures and updating. I'm on day 5 now.
You want to know more than what little I have written go to these site to know more and they are the ones I following the "Hows To".

The rest of my garden is doing good. I have 2 beds left to clean up and one of those beds I have to replace the old boards that have been rotting and falling apart.


pototoes

Comments

  1. I like your veggie garden, it looks great and is quiet big. Wonderful, can see the work and love you put in it.
    Greetings,
    Sylvia

    ReplyDelete
  2. I read about this method a few weeks ago AFTER I put in my teeny garden (tomatoes) but think I'll try this method next year. I'd only need 3-4 bales so should be doable. Just need to find a source for the bales locally.

    ReplyDelete
  3. I can't wait to see how that turns out...your garden is amazing!

    ReplyDelete
  4. Interesting idea. And does the straw breakdown in to the soil, or do you compost it later?

    ReplyDelete
  5. I checked their website, got the info. We may be moving a shed, with rock hard compressed soil below. This my be the perfect thing to get veggies started there. Thanks! I may do a link back to share :)

    ReplyDelete

Post a Comment

Welcome friends to share a thought, I enjoy reading them and will try my best to reply back by email most of the time. But if you do not hear back it's because you are a no-reply blogger.

Popular posts from this blog

How to Make a Portable Design Wall

I had wanted to get a portable design wall to take to retreats but did not want to pay the price. Looked at various pins on pinterest and took ideas from more than one to come up with my verison. It worked out great and only cost a fraction of the price. The PVC pipes, joints and 2 yards of felt cost under $22.00 My design wall is 4' x 4' which stands approximately 5 1/5' tall. For this size need 2 - 10ft length of 3/4" PVC pipe for the frame and 4ft of 1" PVC pipe for the feet Cut the 3/4" PVC into 4 - 4' section                                                                                       2 - 1' section              Cut the 1"  PVC into 4 - 1' section          The joints you'll need will be 2 - 3/4" elbows 2 - 3/4" T's 2 - 3/4" to 1" T (this will be the base of the Feet) 4 - 1" elbow Also need pipe cutters (this cost me almost as much

Yarn Along 2/20/13 Spoon Pin Doily

It's snowing here and I know some of you are tired of snow but here we will take the moisture any way we can get it. Plus it just gives me a reason to stay in and work on some of my projects. In this picture I'm not sure if you can make it out but in the background there are some wild turkeys that hang around the house sometime, just  chilling This project I'm working on is Spool Pin Doilies.   I had never heard of them before until Bonnie Hunter had mentioned it on her blog . She a had a viewer send her one for her sewing machine along with a pattern. I did not like the pattern but loved the idea so I decided to make up my own version. I wanted a more simple, smaller and fuller doily. So I tried different thread sizes to get one that I like. (From left to right) I tried sock yarn, which I'll redo because I think I like that look. Heavy weight crochet thread, nope too big Bamboo yarn, I like it. Looks good on my Kenmore. Pearl cott

What's Up

Well that is a big question, what's up Seeing how I haven't posted since before the retreat I went to. So I will show what I did at the retreat and what I have been doing these past few days, which is this Log Cabin Christmas Tree  wall hanging I have the blocks completed and now it just a matter of getting them sewn together. I'll get to that tomorrow. While at the retreat I made this baby quilt top with the disappearing 4-patch block. I had a charm pack and used some "snow" fabric Kaufman snow is one of my favorite whites to use. It's white but not a stark, bright white, goes well with a majority of the fabric I've collected. I started late making my blocks for RCS14 First I wasn't sure what pattern I wanted to make and then with all that was going on the first part of the year, I didn't start until July. One quilt is using a quarter log cabin in solid colors. I made these at the retreat, have the other half t