I am so excited to be a feature on the Farm Girl Friday Blog Fest

Thank you
I cook with cast iron cookware, mainly right now skillets and a grill pan but someday I hope to have a nice set of enamel cast iron cookware. I love cooking with it, the even heating it has, the heat retention and the durability. Just can't go wrong.
A little history here, I had read that it was not uncommon for women over a hundred or more years ago, would consider their cast iron pan to be of value and would will them to a daughter or granddaughter at their death. Now I'm not sure if my daughters would consider them as valuable as that but you can't beat a well seasoned pan.
And speaking of which, that is what I'm going to write about. I have to admit I have my favorite pans, which are in the house and then I have a couple that I use only for campfire cooking. That being my 12 qt. dutch oven (with legs) and a my 15" (13.5 lb.) skillet.

It's a biggie.
You can fry a whole fish in that pan.

It's a biggie.
 |
| Compared with a 10' and 6" skillet |
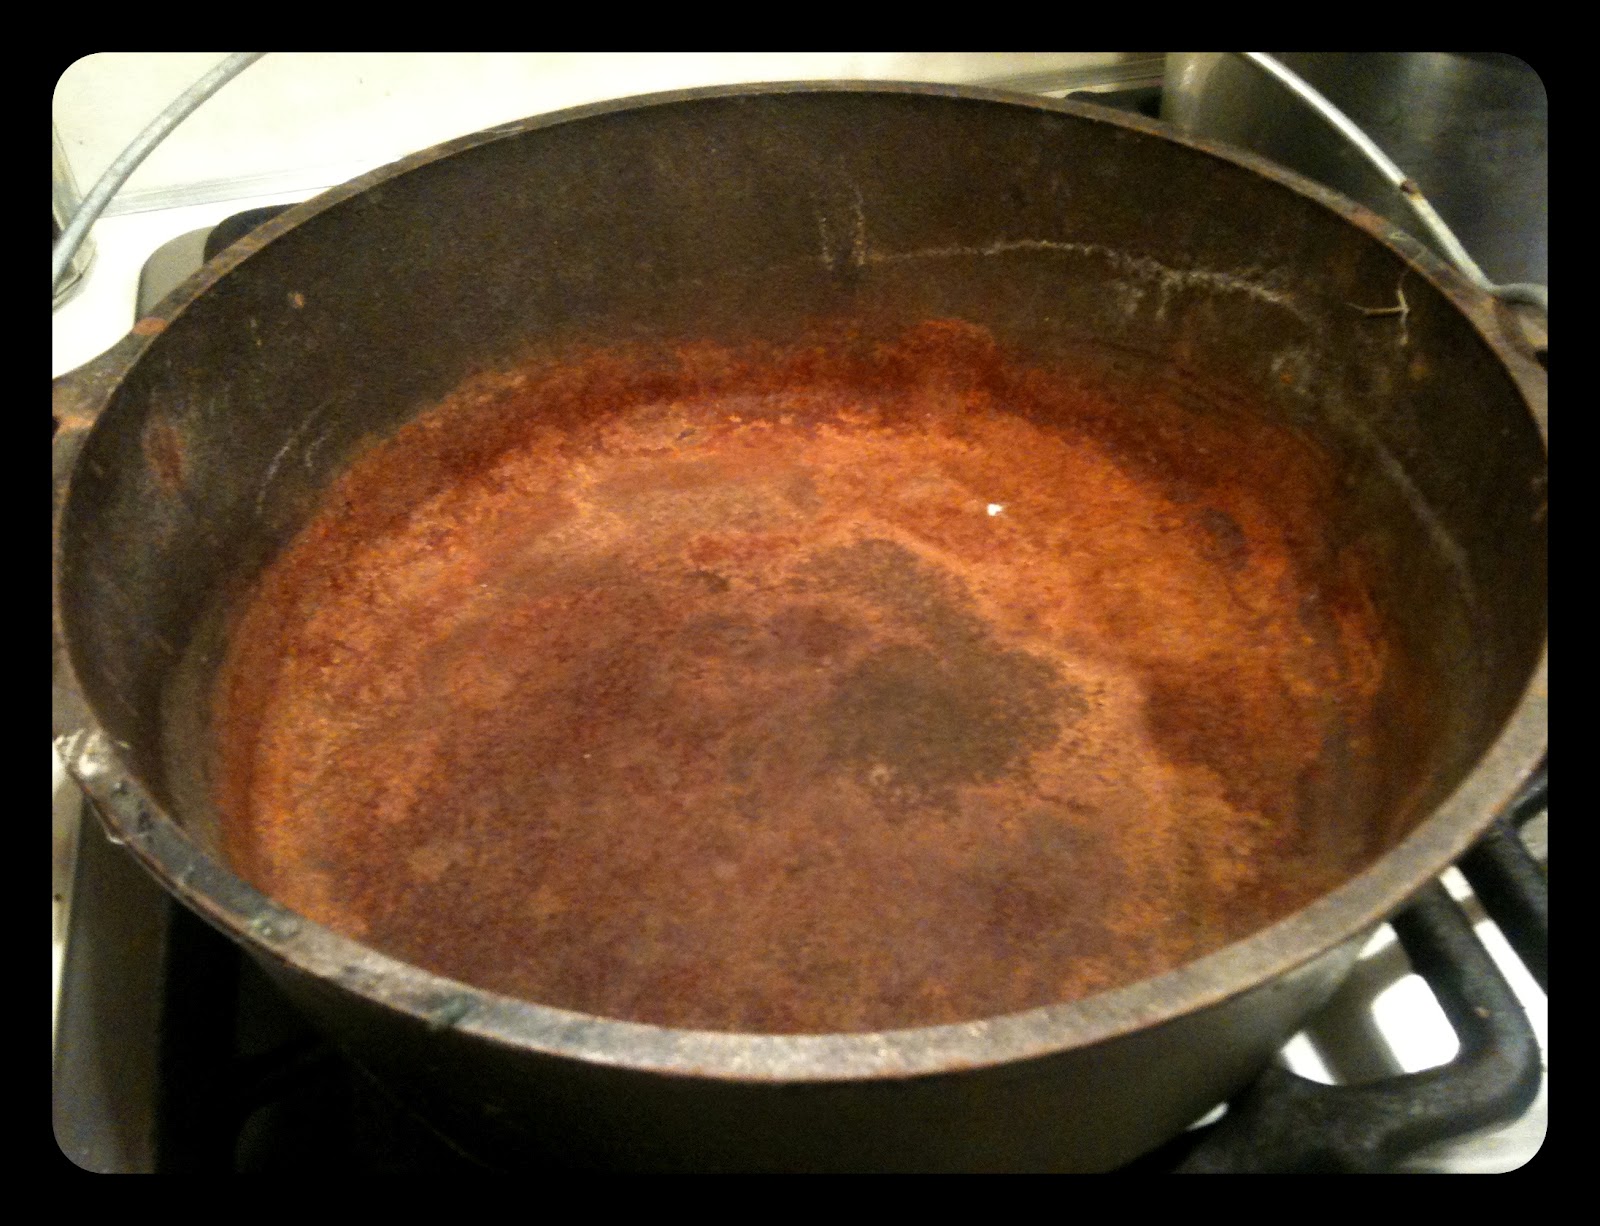
It has been a couple of years since I have done any campfire cooking so needless to say I forgot about my oven that was in the garage all this time. Well being out there I guess with the humidity we have, it caused it to rust some, but it's savable.

If you have one that is in worst condition then my pan, it might need to be sandblasted. You might have seen pans in this condition at garage sales or flea markets and maybe passed them by thinking that it is an old rusted pan. But a good quality made cast iron pan is worth a lot so if it is a decent price I would snag it up. And to get them back in cooking condition usually just take a little elbow grease and a good seasoning.
If you have one that is in worst condition then my pan, it might need to be sandblasted. You might have seen pans in this condition at garage sales or flea markets and maybe passed them by thinking that it is an old rusted pan. But a good quality made cast iron pan is worth a lot so if it is a decent price I would snag it up. And to get them back in cooking condition usually just take a little elbow grease and a good seasoning.
That's is what I was able to do to the dutch oven.
I took a S.O.S. pad

and scrubbed like a mad women.

Now if you have a willing husband or a teenage son or daughter you can get to do it, go for it. But seeing that "the man of the place" was out and no kids here, it was for me to do.
I use to be able to scrubbed a lot harder and quicker 20 years ago but I got it done.

and scrubbed like a mad women.

Now if you have a willing husband or a teenage son or daughter you can get to do it, go for it. But seeing that "the man of the place" was out and no kids here, it was for me to do.
 |
| This is after first attempt |

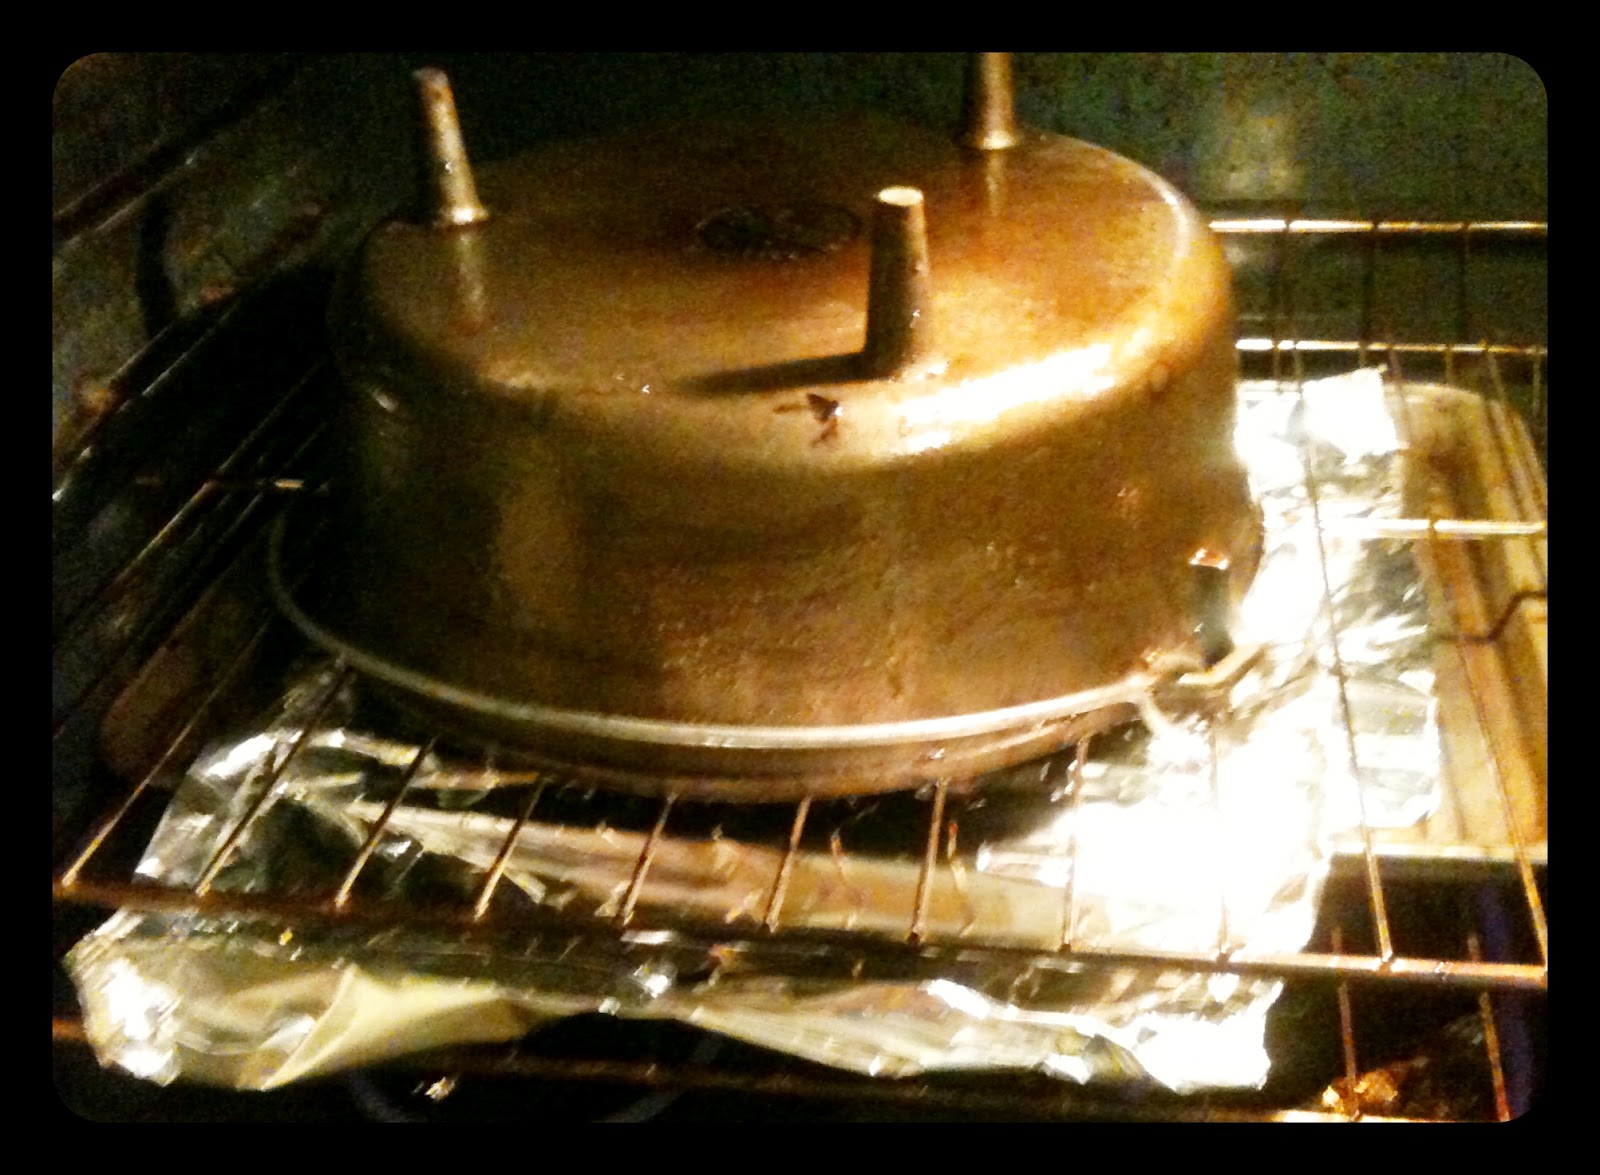
Then after scrubbing, rinse it well and dry it off with a cloth. Normally when I clean my mine, I dry them on the stove (I have gas) but seeing how you need to be able to handle your pan for the applying on the oil it needs to be cool.

You'll need to coat the entire pan with an oil, vegetable oil not peanut or animal product like lard or such. If you have shortening that works wonderfully and that is what I have used in the past but I did not have any today so I used canola oil.
Then you will put you pan in a 350* oven on the the rack upside down, with a cookie sheet lined with foil on the rack underneath. This catches the hot oil that will drip from the pan. Being upside down is so the oil does not accumulate inside the pan. It will stay in the oven for one hour. After it has cooled then you can repeat the process again. Recommended that you do treat it at least two times, preferably 3 times.

Now it is ready for use


For more info on use and care, is a link to
I used to use cast iron when we lived in Idaho years ago but I found when we moved to Arkansas 32 years ago that I have always had a little trouble with rust. I normally clean it as you do and then put it upside down on the burner of the stove to dry it out - maybe 5 minutes or so then oil it lightly and wipe it out - I will give your method a try - I still have the skillets but not the dutch oven (darn) I will keep an eye out for one.
ReplyDeleteIt's kizmit...I have been meaning to season a newly aquired pan that I picked up but have been too busy blogging instead of looking the seasoning info up. Guilty as charged!
ReplyDeleteMine is just a little mini frypan, great for an egg or a grilled cheese sandwich.
Thank you very much =)
Nice job! I use my 12" (or 14"?) alot too...
ReplyDeleteI recently bought a 12 inch to make corn bread in. Years ago, I had one and another bigger one but downsized my kitchen and got rid of them. I had an 8 inch that I made corn bread in but it is better to make it in a larger one as the crust is the best part. I'm glad they come pre-seasoned now....I want a dutch oven like yours....someday.
ReplyDeleteMama Bear
Thanks for sharing this. Although I do have a few cast iron skillets, I have been looking for a large cast iron pot. At this point, I don't want to pay the price of a new one, and I have actually passed them by at thrift stores thinking they were too rusted. I will definitely be keeping an eye out now, and trying out your suggestions. Thanks.
ReplyDeleteDear Kathleen,
ReplyDeleteThank you SO MUCH for this wonderful tutorial. I did in fact get some rusty cast iron skillets and pans at a yard sale last month. This post was timely and a real help. Have a great week.
Your post was featured this week on our Blog Fest! Thanks for sharing!http://fresh-eggs-daily.blogspot.com/2012/09/farm-girl-friday-blog-fest-1.html
ReplyDeleteI have a small Lodge in the oven now, it seemed to need reseasoning. Which led me to the cellar to dig out a larger pan that, years ago, I had painted on the bottom underside along with 2 others to use as decorations in my old kitchen. I wonder how a drill/dremmel would save on the knuckles?
ReplyDeleteI bet a lot. I had read if you can get it back down to the clean metal that was a good thing. You would (I think ) want to go ahead with seasoning at least 3 times.
DeleteI would love to know how it turned out.
Another way to save a used piece of cast iron, or revive an old one, is to throw it into a fire. Yes, a fire. Like a camp fire. Sometimes heavily used skillets will build up crud (sorry, couldn't think of a better word), and no amount of elbow grease will remove it. I inherited some skillets from my aunt, but they were quite disgusting. I threw them in a fire I had built in the back yard, and when they were done, they looked like new. So I will never turn away a decently priced piece of used cast iron. I know I can clean it and kill any germs easy peasy.
ReplyDeleteYou are so right, I had done that when it was just crud, you know yucky build up. And it does work wonderfully.
Delete