I found out yesterday that Audrey at Quilty Folks is having a link up for her idea of doing one circle a day.
She calls it Quilty 365.
Well after I had read her post about what she was doing, it was a no-brainer .....I was in on this. I had to think about what I wanted my circles to be as far as color and design.
So after some thought of what to make, the only good answer was, an I-spy quilt
How long I have been collecting fabric ? Long before they were born.
And since these are for two toddlers, I'm hopeful that they will get a lot of wear and youth. The technique of putting the circles onto the background needs to be what I consider more sturdy, something that can take some wear and washing.
I love to hand appliqué but I just thought machine work will hold up better with two little boys.
 So what I do is from my collection of fabric here, I will cut out a 4 1/2 in. square.


I'm using the featherweight just so it's not too heavy.
 Place fusible side of interfacing to the right side of the fabric
 On the machine stitch inside that trace circle by a quarter of an inch all the way around leaving no gaps go from end to end.


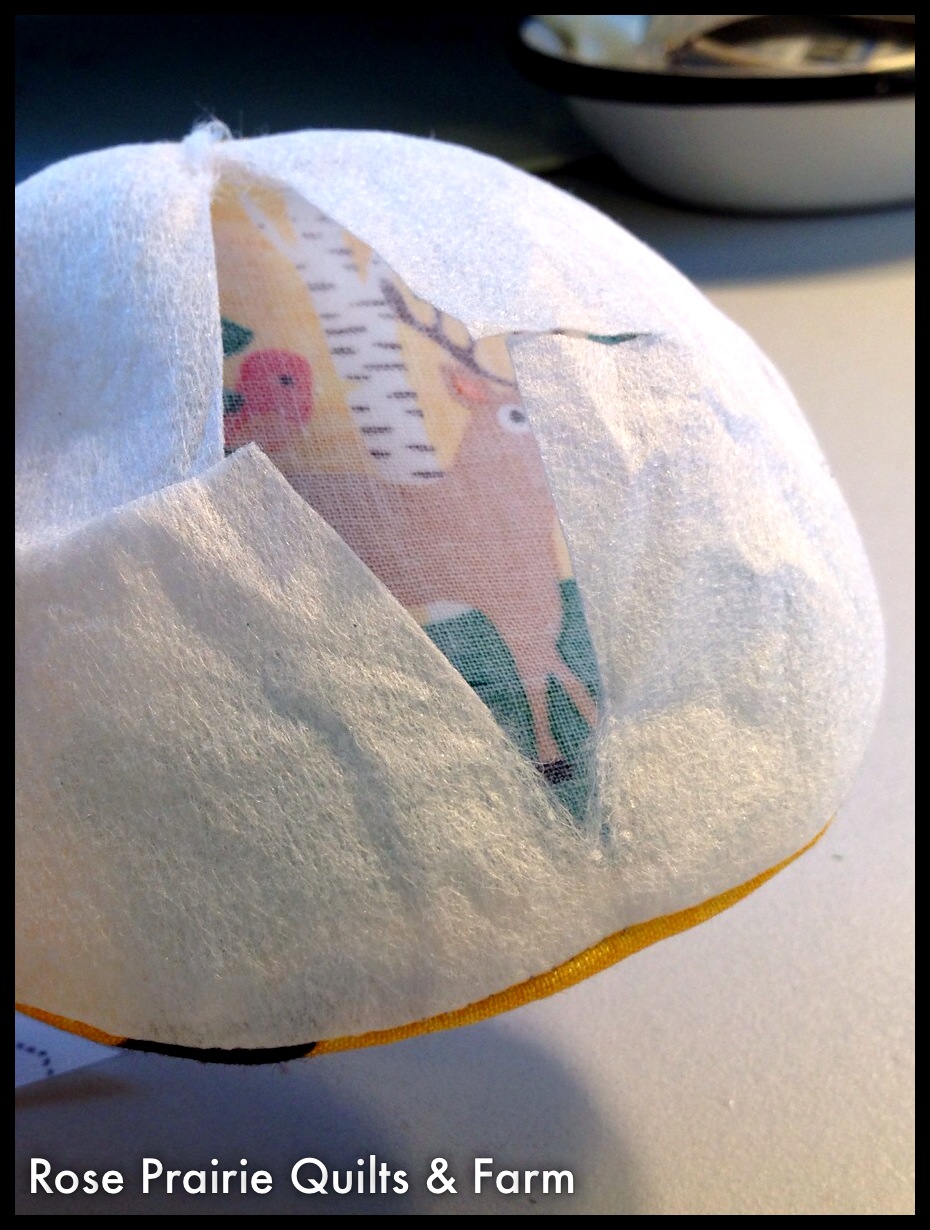
Give it a good push around the seam line inside the circle to get the circle to come out as best as possible. If you need to snip the curb by all means do that if you should trim your curve seem allowance on the outside real short like an eighth of an inch it works really well


Then I take my squares that I had pre-cut of my background fabric. Right now there are three different choices. But I figure I'll be adding to this before the year is up. They are cut to 6" squares because I thought that would work best for making a twin size quilt for each one of the boys. I believe Audrey is using a 4 1/2" square and I have the others who have done multiple big small various sizes.


By folding in half and finger pressing creating creased lines on the circle and square gives me get some registration point line them up and then I just press it.


Now it's ready to be pressed onto the fabric with my hot iron, fuse according to directions and now it's ready to be stitched on with the machine.
Also since I have twin grandsons, I'm making two quilts, so I'm going to need extra circles according to my math. I started making my circles 9 days ago. November 24.
To which these are my circles I have made in the past 9 days.
 This picture is for the month of Nov.


and these are for Dec. and you can see that this month I will focus on a holiday theme. I am thinking this will work out just perfect.
I want to thank Audrey for this idea... it gave me the inspiration to actually get going on the boys quilts that I've been wanting to do.
I'm linking my post to Audrey's link up and here's the link if you want to go check out what others are making with her inspirational idea.

Ahh.. I just love your I-Spy version. So much fun for you and then later the boys! I've done that same applique method before and you're right, it ought to hold up to lots of wear and tear! Thanks so much for playing along.:)
ReplyDeleteGreat circles! Have fun making them, I am sure that your boys will love the quilts! xx
ReplyDeleteYour I-Spy quilts are going to be so much fun for the boys! I like your applique method for making the circles sturdier for a child's quilt. I would use this method for a grandson's quilt too.
ReplyDeleteI love to make I Spy quilts. This is an adorable idea. I love the fabrics you are using.
ReplyDeleteWell hands down these will be the most fun quilts amongst all of ours...can't help but smile looking at these circles! :)
ReplyDeleteinteresting way that you do your circles - I have seen someone do this with used dryer sheets instead of fusible for the sewing in the circle part then just use pins to pin in place instead of fuse. I might try your way for a change and see if I like it better than my way of gather with thread around template, press circle and then pin in place.
ReplyDeleteYour boys will love their I spy quilts with all those fun circles! Thanks for sharing your circle technique, must try that soon :)
ReplyDeleteI love seeing how each person is approaching this. Love your I spy approach and your method. Thanks for sharing.
ReplyDeleteSounds like a great plan! I love seeing all the different ways everyone is incorporating Audrey's idea!
ReplyDeleteFabulous idea. Your grandsons are going to love their new quilts!
ReplyDelete